
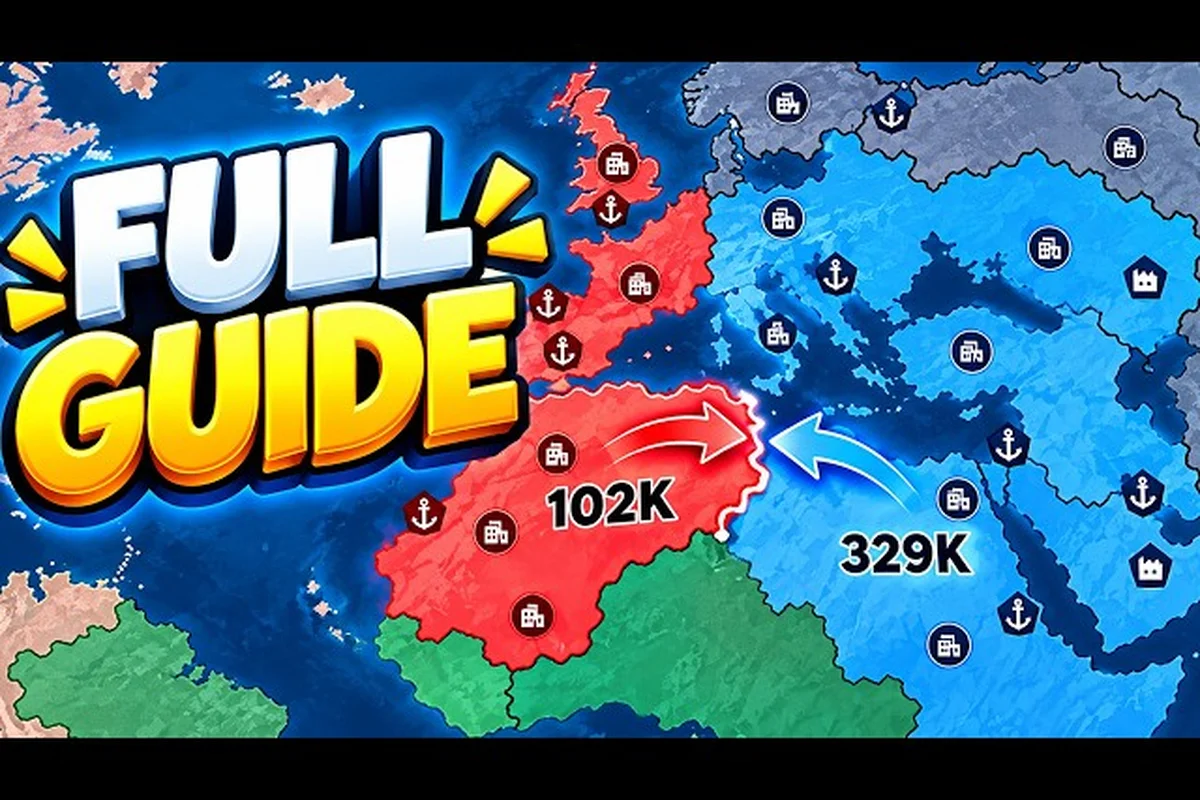
RoWorld 80 percent win guide tactics turn a crowded map into a controllable campaign, and that matters because the official game page lists 80% world control as the victory condition. Focus on territory count rather than scattered wins: prioritize adjacent expansion, use alliances to stabilize exposed borders, and regroup when simultaneous attacks split your forces. In a solo match, secure neutral regions before contesting enemy territory; in multiplayer, coordinate with allies on shared targets and avoid leaving a 60% control threshold unguarded.
RoWorld 80 Percent Win Guide Overview
The official RoWorld game page identifies 80% world control as the match objective. It also lists 88 player nations, hundreds of tribes, cities, ports, factories, alliances, and nuclear weapons. A server can contain as many as 55 players, so merely surviving is not enough: your nation must secure enough territory while keeping the land it already controls.
This roWorld 80 percent win guide focuses on decisions you can make in real time rather than unsupported troop or economy formulas. Because RoWorld does not publish building prices, attack multipliers, income rates, or exact unit strength, this guide uses verified structural facts and tactics observed in player footage. That distinction matters: the 80% territory objective is official, while any specific strategy remains a practical recommendation rather than a developer guarantee.
Think of winning as a sequence of four linked systems: land control provides the territory base, economy finances the next wave, army preservation protects gains, and diplomacy limits hostile fronts. For example, claiming a coastal city may open access to ports and factories, but it can also expose a new border to a neighboring player nation; evaluate each claim by its economic value and defensive risk, not by the number of tiles added alone.
-
Secure land to create a dependable territorial base.
-
Build economy so expansion does not consume every available resource.
-
Preserve armies by avoiding simultaneous commitments.
-
Manage relationships so alliances and diplomacy reduce the number of enemies surrounding you.
A strong opening can still produce a late defeat if every captured tile is exposed. Conversely, a modest start becomes dangerous when your economy, borders, and alliances mature together. The central lesson in this roWorld 80 percent win guide is that territory is a resource: each new claim adds potential, but it also creates another border that somebody else may attack.
Win-condition checklist
Use this compact checklist to evaluate your position at regular intervals, especially after taking settlements, changing borders, or committing troops to a front. It keeps a large match from turning into disconnected actions by connecting expansion, army readiness, border security, alliance stability, and late-game focus. The goal is not simply to reach 80% territory; it is to control enough key land to support further expansion while keeping reserves, defenses, and cooperation intact.
| Checkpoint | Question | Healthy response |
|---|---|---|
| Early expansion | Can we claim nearby land safely? | Yes, without confronting a strong neighbor |
| Army readiness | Do we have reserves for one emergency? | Yes, without sending every troop away |
| Border security | Can we defend likely attack routes? | Yes, using territory and buildings |
| Alliance stability | Do partners share a practical objective? | Yes, with clear short-term cooperation |
| Late-game focus | Are we expanding on one front? | Yes, unless a threat requires another priority |
This checklist should be reviewed after major land changes, not only when a battle begins. If a player cannot answer several questions, the next action should be consolidation rather than another attack. Territory percentage is meaningless if a player is losing the land behind their front line.
Solo Expansion and Territory Control
A solo player faces a different problem from a coordinated group. There is no ally to cover a neglected border, no partner to fund a second front, and no extra commander watching the map. Your best advantage is flexibility: a solo nation can redirect attention quickly and avoid commitments that a larger team cannot support.
The best opening is based on immediate space, not a distant dream of controlling four corners of the world. Community footage consistently shows players establishing a capital, claiming nearby empty land, building an economy, and only then engaging more dangerous neighbors. This sequence is especially important in a roWorld solo guide because every early mistake must be repaired without allied reinforcements.
Choose a defensible starting region
Your capital should have useful space around it, but “defensible” does not necessarily mean isolated. A corner may offer fewer approach routes, yet it can also be far from trade, alliances, and activity that benefit a developing nation. An interior position may provide broader expansion options, although it can expose you to several directions at once.
| Starting position | Strength | Main risk | Better early objective |
|---|---|---|---|
| Coastal region | Ports and outward trade access | Attacks along exposed shoreline | Build a protected coastal network |
| Inland region | Broad land access | Difficulty finding a secure border | Claim a compact cluster first |
| Corner region | Fewer practical approach routes | Isolation from other nations | Create a strong local economy |
| Central region | Many nearby options | Immediate pressure from strong players | Secure one clear direction of growth |
Choose based on your server’s current state, not a fixed rulebook. If neighboring players are already fighting, an inland pocket may offer temporary calm. If the map is peaceful, a coastal opening may produce more useful connections. The broader roWorld economy mechanics overview explains how cities, ports, factories, and territory can support that decision.
Expand in a compact cluster
A compact start creates fewer exposed borders, makes construction more defensible, and keeps movement between your buildings manageable. Expanding into a distant region may increase the nominal territory percentage, but it creates a corridor that an opponent can threaten. It also divides your attention and may require infrastructure in places you cannot quickly protect.
For a solo player, the practical target is not the highest possible national percentage but the percentage that can be protected without tying up the capital. For example, claiming a close resource tile that links two existing settlements is usually more valuable than claiming a remote tile for the same nominal percentage: it improves connected land, reduces frontier exposure, and shortens the route between production and defense. Treat the 80 percent figure as a diagnostic milestone in the roWorld 80 percent win guide, not as a reason to overextend the border for one more claim.
-
Claim first, refine later. Empty nearby land offers immediate value; perfect borders are unlikely to appear.
-
Avoid thin lines. A scattered set of claims can be harder to defend than a connected territory.
-
Keep one reserve path. If every route from the capital crosses a frontier, the nation can be trapped.
This is the central territorial lesson of the roWorld 80 percent win guide: percentage is a score, while connected, productive land is the engine that lets you protect that score. Solo players should treat distant land as an investment that requires additional security, not as an instant win.
When a solo player should pause expansion
A good pause does not mean doing nothing. It means redirecting attention to construction, defense, diplomacy, and army recovery. Pause expansion when you face a strong nearby opponent, lack a practical troop reserve, depend on one vulnerable route, or have seen your building network lag behind your land claims.
The roWorld solo guide should therefore include an emergency reserve concept, not an invented reserve percentage. The official page does not publish a recommended troop count, so use what the interface shows and preserve enough strength to handle one threat at a time. If you cannot commit to another front without leaving the capital exposed, gather strength before attacking again.
Team Attack Timing and Front Management
Teams win by converting several advantages at once: more builders, more decisions, and the ability to coordinate pressure. They can also lose faster because a weak member exposes the entire alliance. This is why the roWorld team guide emphasizes synchronized priorities rather than a simple “attack together at all times” rule.
The official game page confirms that alliances are part of RoWorld, but it does not specify their mechanics. Players should therefore treat alliance behavior as a live coordination problem. A verbal promise to help is not a plan unless members know the target, timing, fallback, and territory each side expects to secure.
Choose one primary front
Community reports and player videos repeatedly favor a simple operational principle: fight one front at a time. Starting a second major conflict while the first is unresolved splits income, attention, and troop availability. If the first attack stalls, the second front can become an opening for a third enemy.
| Team arrangement | Main benefit | Main danger | Best use |
|---|---|---|---|
| Single-front assault | Concentration and clear objectives | One successful defense can stop the plan | Capturing a valuable neighboring region |
| Two-front pressure | Opponent must divide attention | Overextension across the map | Limited probing or emergency containment |
| Player-led pincer | Can split enemy defenses | Coordination delays and unclear roles | Experienced teams with rehearsed timing |
| Diversified construction | More members strengthen the network | Uneven development can cause frustration | Building a durable alliance before a major push |
A useful team plan names the primary target, the support roles, and the stop condition. If members disagree about objectives, small misunderstandings can become costly delays. Before attacking, agree on who enters first, who protects the flank, when support is expected, and what happens if the target calls in an ally.
Build around roles, not equal contributions
Every player does not need to spend every moment attacking. Assign broad roles such as economy, frontline pressure, flank security, scouting, construction, and diplomacy. This is a tactical framework, not an official unit system. It helps ensure that the same person is not simultaneously expected to build, attack, defend, and negotiate.
For a larger roster, use the roWorld team and multiplayer guide to connect positioning with general expansion principles. The most important discipline is preserving the ability to concentrate forces later. Teams that continuously spend their armies on minor borders may have a busy map but no decisive reserve.
Attack against weakness, not just weakness in troops
A neighboring nation can be vulnerable because it has fewer defenders, weaker borders, damaged infrastructure, unstable alliances, or little ability to reinforce a distant area. Choose the objective that your team can exploit without becoming trapped. The goal is not merely to cross a border; it is to occupy useful territory and keep it.
Before committing, compare the attacking force’s actual combat power, troop transport capacity, and supply reach against the target’s local garrison, terrain bonuses, and reinforcement distance. For example, overwhelming a lightly defended settlement is poor strategy if the team lacks supply trucks to hold it or opens a third hostile border. Measure the prize in defensible territory and economic value, not the number of enemy structures destroyed.
-
Scout the intended route and note exposed flanks.
-
Identify the defender’s likely reinforcement direction.
-
Decide which buildings and settlements are worth taking.
-
Establish a fallback if the attack stalls.
-
Avoid extending beyond the team’s secure supply area.
A capture that opens three hostile borders can hurt the match more than it helps, especially if each new front adds garrison pressure, supply trucks, and reinforcement routes to maintain. A smaller conquest is often better when it yields defensible territory and improves income without stretching the team’s logistics. For example, taking a lightly defended settlement with a nearby resource building may secure a stronger economic position than destroying a distant structure that requires a costly second front.
Defense, Alliances, and Negotiation
Winning 80% of the world requires keeping enough of the map to continue taking more. Defense and diplomacy are not interruptions to conquest; they determine whether your conquests produce lasting control. The best roWorld multiplayer guide treats alliances as risk management, not merely a way to reduce the number of visible enemies.
A defended claim creates a cost for an attacker. Fortifications, cities, ports, factories, and troop presence can all shape that cost, though RoWorld does not publish fixed defensive multipliers. More important is the relationship between those structures: where they are, how quickly you can respond, and whether your allies can reach the threatened border.
Build layered defense
A layered defense starts with warning time. Your defenders should notice an approaching force, gather nearby troops, and have a fallback position before the battle reaches critical buildings. The next layer is concentration, because troops scattered across distant borders can be defeated in detail. The final layer is reinforcement through nearby infrastructure or allied support.
| Defense layer | Purpose | Practical action |
|---|---|---|
| Early warning | Reveal attacks before contact | Scout borders and watch for sudden movement |
| Local concentration | Avoid isolated defeats | Keep nearby forces ready to respond |
| Fortified core | Protect valuable infrastructure | Concentrate buildings and troops near key areas |
| Allied support | Deter larger threats | Share intelligence and agree on response duties |
| Recovery buffer | Rebuild after a setback | Preserve reserves and protect secondary settlements |
Do not build every structure in the same place. A capital surrounded by defenses may be secure while distant territory collapses, or a distant chain of buildings may be efficient but impossible to defend. Review placement decisions in the RoWorld building and settlement guide to match infrastructure with strategic priority.
Use alliances to reduce active fronts
An alliance is most valuable when it changes where opponents can safely attack. If two members cover adjacent regions, neither can be isolated as easily. A useful agreement should define immediate cooperation, warning procedures, shared targets, and how conquered territory is handled. Those details are created by players because official alliance rules are not published on the game page.
Avoid vague commitments. “Help when possible” may fail at the exact moment a neighboring border breaks. A better arrangement identifies which border each member watches, what support can realistically arrive, and what the group prioritizes if several threats appear. This is especially important in a roWorld multiplayer guide, where one mistaken attack can force a faction into a defensive collapse.
Negotiate from a position of value
Diplomacy works best when you know what you can offer and what threatens the other player. A shared border, an impending attack, a valuable building, or a common enemy can all create reasons to cooperate. Avoid making promises your nation cannot fulfill; one broken alliance can cause more damage than a failed negotiation.
For a reliable multiplayer negotiation, translate “position of value” into three concrete assets: border leverage, actionable intelligence, and a limited defensive commitment. For example, if an ally controls the route to a threatened city, offer coverage against the nearby enemy before requesting access to their resource area; if you cannot trade land, trade protection or warning about enemy movements. This creates an exchange that can improve your solo and team match plans without requiring a permanent alliance, while keeping broken promises and overextension from undermining the agreement.
-
Identify the boundary both parties can influence.
-
Share relevant intelligence about nearby threats.
-
Define limited cooperation before discussing larger ambitions.
-
Preserve the option to adjust the arrangement as the match changes.
-
Avoid splitting attention while a common enemy remains active.
RoWorld includes nuclear weapons as a listed feature, but no official tactical guidance or exact effect is provided. Treat their presence as a strategic risk that can affect trust, not as a guaranteed solution. A player who cannot protect against a threat should build alliances and defenses that reduce dependence on one weapon or one favorable fight.
Midgame and Late-Game Win Conditions
The early game is about establishing a viable position, while the midgame is about choosing which advantage will compound. The late game may look like a land grab, but it is actually a test of operational endurance. Your economy, alliances, borders, and army must still work after the map becomes crowded.
This roWorld 80 percent win guide uses a three-phase model because it helps players connect current actions to the 80% objective. It is a planning framework, not an official game phase, and it remains useful regardless of the match timer because every server develops differently.
| Match phase | Main priority | Common mistake | Corrective action |
|---|---|---|---|
| Opening | Create a safe, productive base | Fighting a strong neighbor too early | Claim nearby land and build first |
| Midgame | Choose a profitable growth front | Expanding in several directions at once | Concentrate on one target |
| Late game | Consolidate control and protect it | Chasing 80% while borders crumble | Repair defenses and secure key territory |
Midgame: test one direction
By midgame, players should know which border is easiest to pressure and which relationship offers the best strategic value. Test one direction with limited commitments. If it works, concentrate resources. If it fails, change approach rather than feeding troops into the same contested region.
Use a simple decision loop: compare the expected value of two possible pushes against the value of defending your strongest border. For example, if one border is lightly fortified and adjacent to a valuable resource area, send a scouting force first and measure the opponent’s response before committing the main army. A successful probe can reveal a favorable opening; a failed one signals that the contested region is not worth reinforcing. In each case, preserve enough troops to protect your base, because temporary territorial gains are worthless if the core becomes vulnerable.
-
Observe where opponents are strengthening.
-
Choose one objective with a clear military purpose.
-
Commit enough force to threaten it, but not so much that your core is exposed.
-
Evaluate the result after the operation.
-
Reinforce success or withdraw without losing your base.
This loop fits the broader early, mid, and late-game progression guide and keeps decisions tied to territory rather than excitement. In practice, the useful comparison is not “push now or attack later,” but “gain this resource zone now or spend the same resources securing a safer border.” If a scout reaches the target without drawing a heavy response, convert the opening into a concentrated push; if the defender shifts troops and reinforces the route, withdraw before the engagement becomes a costly siege. That distinction preserves base security while letting each midgame test produce useful information for the next objective.
Late game: convert influence into control
Approaching 80% control changes how you should evaluate attacks. Capturing a small disconnected region may add little practical value while creating several new fronts. The better target is often a connected area that links your territory, protects an economy, and removes a nearby rival.
At this stage, ask three questions before every operation: does the target fill a meaningful territorial gap, or merely add scattered control percentage? Near 80%, each new sector should improve a faction’s cohesion, economy, or defensibility; for example, taking a corridor that links two separated strongholds can be more valuable than capturing an equal-size exposed region. Compare the operation’s control gain with its upkeep cost, frontline exposure, and the enemy’s ability to counterattack before committing your solo or multiplayer forces.
-
Does this capture make your existing territory safer?
-
Does it improve your economic or logistical position?
-
Can you defend it after taking it?
If the answer to all three is no, the operation may increase your score without improving your chances of winning. Late-game players should also watch for enemies using a two-front strategy against a stretched faction. A brief truce may be worth more than a risky conquest.
Read the map by fronts, not tiles
The 80% figure can make the map appear to be a collection of individual claims, but battles operate around connected fronts. Identify where your territory is narrow, where an opponent can reach several objectives, and where your strongest force can move without crossing hostile land. This simple map analysis often reveals better moves than staring at the raw percentage.
A practical final review should compare claimed land, useful land, and defensible land. These categories are not official measurements, but they prevent a misleading scoreboard from hiding structural weakness. If high control depends on distant, exposed claims, stabilize those connections before pursuing the final percentage.
Practical Solo and Team Decision Plans
No fixed build order can guarantee victory because the official game page does not publish exact costs, income, troop strength, or upkeep. However, players can follow a decision hierarchy that remains valid without fabricated numbers. The hierarchy protects against the most common failure: spending resources before understanding the immediate danger.
Solo decision plan
A solo player should scan, settle, develop, negotiate, and then expand. Scanning reveals nearby threats and open land. Settling establishes a capital and claims close territory. Developing cities and other structures creates a stronger base. Negotiating reduces avoidable conflicts. Expanding adds controlled land without ignoring security.
| Situation | Immediate choice | Reason |
|---|---|---|
| Empty land lies nearby | Claim it | Creates low-risk territorial progress |
| A stronger neighbor advances | Defend and negotiate | Avoids an unfavorable early war |
| The economy is neglected | Improve development | Supports future claims and armies |
| One border is weak | Focus there | Concentrates effort for meaningful gains |
| Two fronts become equally urgent | Prioritize the internal one | Prevents enemies from splitting your defense |
For solo play, simplicity is an advantage. A clear capital, a compact territory, and a manageable number of responsibilities are easier to protect than a grand plan with too many dependencies. The roWorld solo guide should lead to fewer emergencies, not merely more actions.
Team decision plan
A team should assign a commander or coordinator when possible, establish a shared objective, and divide roles. The objective should be geographically specific. “Win more land” is too broad; “secure the corridor between our northern and eastern settlements” gives every member a useful target.
| Team priority | Leader’s role | Member roles | Best timing |
|---|---|---|---|
| Opening development | Prevent resource disputes | Builders and scouts | Before major threats |
| Border operation | Select target and timing | Frontline, flank, and reserve | With one clear opportunity |
| Alliance defense | Choose response level | Defenders, support, negotiators | When multiple members are threatened |
| Consolidation | Identify valuable land | Consolidators and builders | After a successful capture |
Teams should rehearse smaller operations before committing everyone. A short operation that ends with clear communication teaches more than a chaotic victory. For additional foundations, the complete RoWorld player guide can help players understand basic progression before applying the more demanding coordination plan.
Use a short decision checklist
Before an attack, answer four questions in order, using the map’s land share, unit positions, and border pressure as evidence: a nearby province may be attractive on the 80 percent win-rate target list but still be a poor fight if its terrain splits your army, exposes a flank, or pulls defenders away from a stronger border. Treat the checklist as a pre-operation evaluation, not a promise of success, and gather more information when the route, reserve troops, or post-capture defense cannot be confirmed.
-
Is the target worth taking beyond its raw land percentage?
-
Is the route or flank comparatively weak?
-
Can the team defend the result afterward?
-
Does the operation weaken another border too much?
If any answer remains uncertain, pause the attack and improve the position before committing troops. Check scout reports, province ownership, unit stacks, and border pressure; for example, a target on the 80 percent win-rate list can still become a bad trade if the approach path crosses a defended border or the capture leaves no reserve units for post-capture defense. This checklist is a decision filter, not a substitute for tactical judgment, and should prevent a weak target from appearing attractive merely because it is geographically close.
Frequently Asked Questions
Can a solo player win 80% of RoWorld?
Yes, a solo nation can pursue the 80% victory condition, although it has fewer resources than a coordinated team. The best approach is to develop a compact, defensible base, expand in one direction, preserve a military reserve, and negotiate when fighting would create excessive risk. The official page confirms the 80% objective but does not guarantee solo victory.
What is the best strategy for reaching 80% world control?
The strongest general strategy combines nearby early expansion, reliable economic development, concentrated attacks, and stable alliances. Focus on connected territory that can produce value and remain defensible rather than collecting isolated claims. Since exact costs and troop multipliers are not published, judge each move by whether it improves your economic base, reduces threats, or creates defensible land.
Should a team attack on multiple fronts at once?
Usually not. Concentrating on one main front gives the team clearer goals and allows reserves to support the operation. A second front can be used for limited pressure or emergency containment, but simultaneous major attacks can stretch members across the map. The best roWorld team guide principle is to create another front only when the first front is secure or the situation clearly requires it.
When should players form an alliance?
Form an alliance when shared borders, nearby threats, or common expansion goals make cooperation safer than competition. Agree on warning duties, response expectations, and short-term priorities before a major attack. Alliances can reduce pressure around vulnerable territory, but vague promises are risky because members may disagree about when and where support should arrive.
How do teams defend territory while expanding?
Teams should divide responsibilities between expansion, infrastructure, scouting, and defense, then share warnings about threatened borders. A strong reserve and nearby reinforcement options matter more than spreading every member across the map. Before a large operation, confirm that the home territory remains stable; if several borders are under pressure, consolidate before continuing the offensive.