
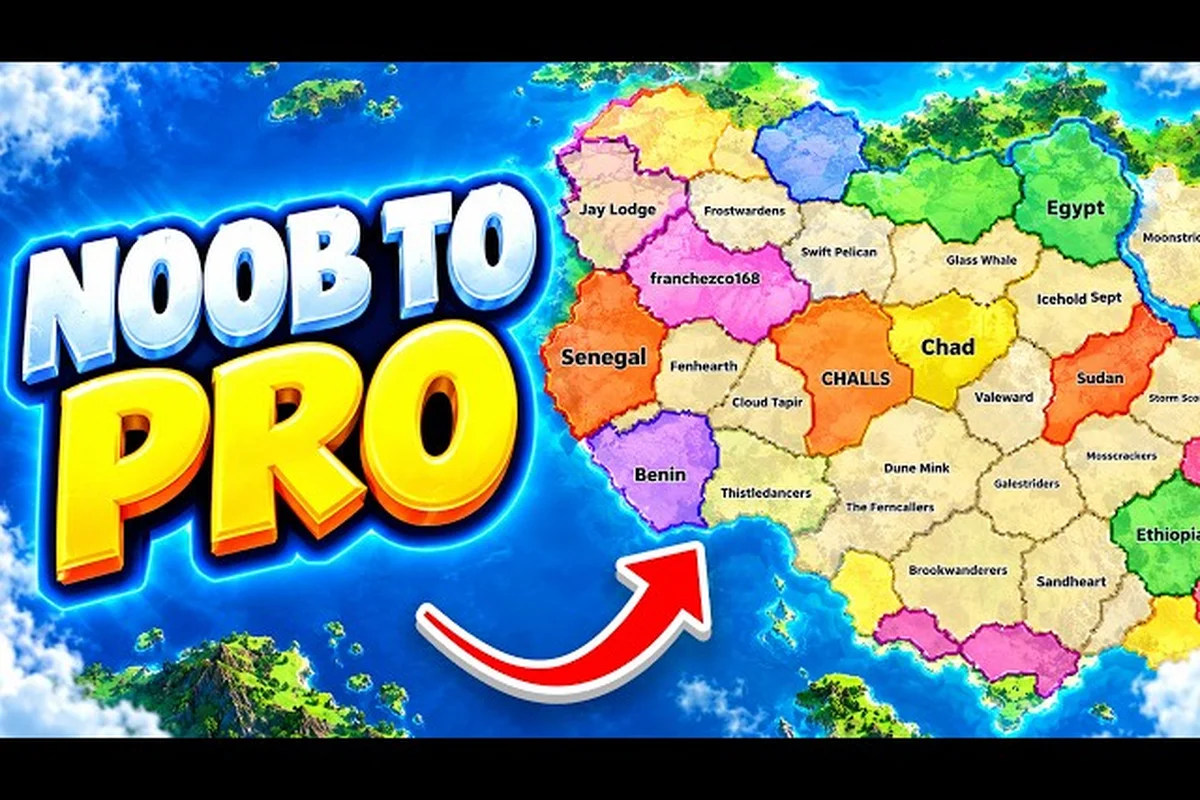
A roWorld war guide matters because winning depends on coordinating economy, troops, defenses, and naval power instead of maximizing one unit. This roWorld war guide explains how to plan attacks, use roWorld troops, deploy roWorld warships, and escalate with nukes, MIRVs, and missiles while preserving a stable defense.
roWorld War Guide Foundations for Winning Campaigns
RoWorld is built around territorial control rather than a single isolated fight. The official RoWorld game page identifies cities, ports, factories, alliances, nuclear weapons, and 88 player nations as core features, with control of 80% of the world determining victory. That scale changes the nature of warfare: a successful operation must connect land pressure, resource production, coastal access, and diplomatic leverage.
This roWorld war guide therefore treats a war as a sequence of linked decisions rather than a queue of units. You first determine what your opponent can produce, then protect the routes and buildings that support your army, and only afterward commit troops to a front. The goal is to make every move either strengthen your position or force a meaningful response.
The Strategic Command Loop
A reliable campaign follows a repeatable command loop. Observe the opponent, preserve your economic base, prepare one advantage, apply pressure, and reassess after the enemy reacts. That sequence matters because a plan built around only one weapon can fail when the opponent changes cities, alliances, or coastal access.
| Campaign stage | Primary objective | Best supporting action | Common mistake |
|---|---|---|---|
| Reconnaissance | Identify enemy strength and borders | Use troop presence to test access | Attacking without identifying production |
| Preparation | Build capacity and protect routes | Improve factories, ports, and defenses | Spreading construction too thin |
| Pressure | Force the enemy to divide attention | Attack from multiple land fronts | Sending every troop at once |
| Exploitation | Capture valuable territory | Follow up when defenses are stretched | Delaying after a successful breach |
| Consolidation | Turn gains into durable control | Repair, rebuild, and reinforce | Chasing distant targets immediately |
This command loop also prevents the most common mistake in large-scale PvP: treating every visible enemy as equally dangerous. A neighboring nation may have more troops but weaker infrastructure, while a smaller coastal player may control the port needed to protect your shipping lanes.
Priorities Before the First Battle
You should establish three priorities before attacking. The first is economic continuity, meaning cities and factories must keep functioning. The second is defensive depth, which allows attacks to recover if the first push fails. The third is target clarity, so every operation has a practical purpose such as securing a border, opening a port, or reducing pressure.
RoWorld’s official listing confirms that nuclear weapons exist, but it does not publish exact build costs, yields, ranges, or damage values. The same applies to the roWorld troops, roWorld warship, roWorld nuke, roWorld mirv, and roWorld missile options discussed in community play. Any numbers circulating outside the game should be treated cautiously unless they can be verified directly in the current client.
roWorld Troops: Build Pressure Without Overextending
RoWorld troops are the main attacking resource, but their value comes from positioning and support rather than sheer quantity alone. Community gameplay observations show a common loop of expansion, economy building, border contact, and war. That loop makes reinforcement timing more important than sending a large army at the first sign of weakness.
A strong player can use roWorld troops to perform several different jobs. Some forces hold exposed borders, others absorb attention, and a third group moves only when the target has been weakened. Treating every troop stack as a spear creates predictable attacks that an opponent can prepare for.
Choosing the Right Troop Role
The safest formation depends on terrain, enemy defenses, and your available routes, so evaluate the frontline before committing troops. For example, a shield force can absorb attention on a divided enemy front, but a breakthrough group should advance only after that opening is created; use a capture force to secure the ground, and keep a reserve group behind for reinforcement gaps or emergencies. The table below compares roles without inventing unsupported damage or cost statistics.
| Troop role | Main purpose | Best conditions | Risk to manage |
|---|---|---|---|
| Border garrison | Deter attacks and preserve territory | Stable front with friendly support nearby | Becoming trapped away from reinforcements |
| Shield force | Draw enemy attention | Enemy has multiple nearby fronts | Overcommitting without a second group ready |
| Breakthrough group | Enter weakened territory | Opponent has divided defenses | Ending the advance too early |
| Capture force | Secure ground after combat | Enemy front is unstable or bypassed | Winning a battle but losing the objective |
| Reserve group | Exploit mistakes or emergencies | A clear contingency plan | Wasting movement and exposing the capital |
The key distinction is between a blocking force and a capture force. A blocking force may be disposable if it prevents reinforcement, while a capture force needs coordination with logistics and production. Losing the first can be acceptable; losing the second often means the operation fails even after defeating enemy units.
Managing Reinforcement Timing
Reinforcement timing is where many campaigns in the roWorld war guide become more effective. Instead of moving one group continuously, divide the army into a forward element, a central reserve, and a home guard. This creates several decision points: commit the forward element, wait for the opponent to reveal strength, or recall and preserve the reserve for a larger opening.
Community reports also support a layered approach to pressure. Attacks against one border can force the opponent to move troops away from a second front, while an alliance can share defensive burdens without surrendering control of key cities. If you use alliances, set expectations before conflict begins; a misunderstood commitment can leave your border exposed while your partner commits elsewhere.
For broader context on how different force types fit together, the RoWorld alliance and unit mechanics overview can clarify coordination roles without assuming that every player has access to the same arsenal. In practice, treat a roWorld warship as a durable screening unit for the forward element, use roWorld troops to secure exposed border cities, and reserve roWorld mirv or roWorld nuke units for confirmed breakthroughs rather than routine reinforcement moves. The same planning should account for roWorld missile range and alliance coverage: a missile exchange may open a narrow window, but committing every nearby roWorld troop to that attack can expose the home guard.
Holding back when production is unstable
Not every weakness deserves an immediate attack. Delay if your production is unstable, your army is stretched across distant fronts, or the target still has several layered defenses. A limited objective can be safer than total conquest because it reduces the distance your troops must travel and gives you time to convert temporary gains into permanent control.
Watch for signs that an opponent is baiting you. A lightly defended city may be disconnected from meaningful production, while the real prize lies behind a fortified border. The best attack is often the one that forces a costly enemy response even if it captures little land immediately.
roWorld Warship and Coastal Warfare Tactics
The roWorld warship is most useful when your strategy has a geographic purpose. Ships are not a free substitute for land troops; they provide a way to contest coastlines, protect transports, or threaten a port-based settlement. The official game page confirms that ports and alliances exist, although it does not publish warship statistics, so positioning and operational clarity are safer foundations than claimed damage numbers.
A coastal plan should identify three things before construction: the friendly port being protected, the sea lane under threat, and the enemy coast you want to influence. If those three goals are unclear, a fleet can become expensive scenery that never changes the campaign.
Fleet Roles and Coastal Pressure
Fleet roles should complement land strategy. A defense-oriented fleet stays close to home ports, a raiding fleet operates along exposed enemy territory, and a transport group supports movement between coastal settlements. Some missions can overlap, but each ship group needs one primary responsibility.
| Fleet assignment | Objective | Terrain advantage | Main limitation |
|---|---|---|---|
| Harbor defense | Protect friendly port assets | Shorter return path to support | May wait without pressure |
| Sea-lane control | Disrupt enemy transport | Intercepts movement between coastal areas | Does not secure inland territory |
| Coastal blockade | Limit port and city access | Pressure concentrated at one frontier | Land troops can bypass some positions |
| Amphibious support | Deliver troops toward a coast | Connects naval and land operations | Requires suitable landing conditions |
| Fleet reserve | Answer a breakthrough elsewhere | Can shift with enemy action | Slow if committed too far away |
Before committing a fleet, compare the route with the likely response. If enemy cities and troops can reach the landing zone quickly, the fleet should either provide more support or attack a location where it creates a wider distraction. Naval pressure is strongest when it changes an opponent’s troop deployment.
Coordinating Fleets and Land Forces
A roWorld warship works best as part of a joint operation. Land troops can pin defenders while ships pressure a coastal route, or ships can create attention elsewhere so an army enters through a less defended border. The exact sequence depends on the map, so test the plan with your active force rather than relying on a fixed opener.
Your fleet should also have an abort condition. If the route becomes too exposed, friendly ports are threatened, or the enemy shifts major strength, withdraw before the operation traps the ships. Preserving a reserve fleet often creates better future options than forcing a weak coastal attack.
Players comparing different military approaches can use the RoWorld strategy tier list as a comparative resource, but tier judgments should inform choices rather than override map-specific realities. A strong archetype on one border may be exposed to a different threat on the next.
roWorld Nuke and roWorld MIRV: Strategic Escalation
Nuclear options change the emotional and strategic pace of a match. The official RoWorld listing confirms that nuclear weapons are part of the game, so discussing escalation is valid; however, exact roWorld nuke requirements, roWorld mirv effects, costs, ranges, and build times are not published. This guide therefore focuses on timing, restraint, and strategic purpose rather than unsupported values.
A nuclear strike is not automatically better than a coordinated conventional attack. It may create an opening, but it can also cause an opponent to rally allies, shift troops toward the threatened border, or redirect attention to you. Treat the weapon as one instrument within a larger plan.
Deciding When Escalation Is Justified
The decision to escalate should come after ordinary options have been evaluated. If your objective is a limited border correction, repeated attacks with roWorld troops may preserve diplomacy and resources. A nuclear option becomes more relevant when a direct path is blocked, the target has absorbed repeated pressure, and the larger strategic benefit justifies the reaction.
| Strategic condition | Better first option | Reason to consider escalation |
|---|---|---|
| Small border loss | Reinforce and contain | A limited objective does not require maximum force |
| Divided enemy defense | Attack the weakest front | Pressure can create a cheaper opening |
| Entrenched stronghold | Surround or bypass it | Isolation may reduce the need for a strike |
| Coalition pressure | Coordinate an allied pincer | Shared pressure can avoid one-player escalation |
| Critical window for territory | Combine land and naval action | Multi-axis attacks may be more controllable |
A player should also consider what happens after the strike. If there is no capture plan, no allied coordination, and no stable border to exploit, the weapon may produce a dramatic moment without changing final control. Build the follow-up before committing to the escalation.
Controlling Nuclear Retaliation
Retaliation becomes more likely when your strategy appears aggressive or when allies interpret your move as a threat to the entire coalition. Maintain diplomatic space by explaining objectives, avoiding repeated attacks on the same civilian-heavy area, and making sure partners understand the intended endpoint. While this cannot guarantee restraint, it reduces the chance that an isolated action becomes a group punishment.
Community observations support treating nuclear use as a late-stage or high-pressure decision rather than a first button to press. The roWorld war guide should account for possible counterattacks on military infrastructure and for the fact that a spectacular strike can cause every nearby player to move at once.
For additional defense planning, the RoWorld naval invasion overview explains how nuclear escalation, missile defense, and broader protection priorities interact. Treat a roWorld MIRV or roWorld nuke as one part of the threat picture rather than a complete defense plan: pair early warning with missile-defense coverage, preserve roWorld warships as forward protection, and maintain fallback positions for roWorld troops. If a launch reduces your defensive capacity or exposes a critical base, neighboring players may gain a safer opening for further attacks.
roWorld Missile, SAM, and Layered Defense
A roWorld missile is most effective as part of a defense chain rather than an isolated building. Your objective should be to make each attack layer slow, expose, and disrupt an invasion before it reaches a city or industrial core. Since the official page does not publish missile damage, cooldown, or interception percentages, build from the principle of overlapping roles rather than exact numerical claims.
Layered defense gives attackers several problems to solve. A distant threat may be stopped before it arrives, a closer threat may be handled by a different system, and land troops remain necessary even after a successful interception. This arrangement reduces the chance that one countermeasure decides the entire battle.
Constructing a Practical Defense Chain
Start with the most important assets. Identify which city or factory would be most damaging to lose, then place defenses in layers around it. The perimeter should create early warning and time, while the inner position protects the actual objective.
| Defense layer | Main function | What it should reveal | Common planning error |
|---|---|---|---|
| Outer border presence | Slows entry and gathers intelligence | Direction of enemy pressure | No support behind it |
| Missile position | Threatens approaching projectiles or units | Whether an attack continues | Treating it as a complete solution |
| SAM coverage | Adds interception depth | Remaining threats near the core | Ignoring alternative attack angles |
| City garrison | Holds ground after other systems act | Enemy breakthrough point | Leaving the city undefended |
| Core production | Restores the army | Capacity to counterattack | Expanding before the economy is stable |
The defense-in-depth principle matters more than any single system. If players know one protective structure, they can redirect attacks; if they must test several layers, they spend more time and expose their plan. Keep the inner defense independent enough to function if the outer position falls.
Matching Defense to Enemy Behavior
Observe what your opponent uses and adjust the chain. Fast raids demand early warning, sustained land pressure demands local garrison strength, and missile or aerial threats demand layered coverage. A defense that answers yesterday’s attack will not automatically answer a changed assault.
Planning details for missile silos and defense posts can be found in the RoWorld factory and defense building overview. Treat those structures as complementary pieces of a wider system, and confirm current build behavior in the live game because no official cost table has been published.
Coordinating a Complete RoWorld Campaign
A complete campaign combines land pressure, naval deterrence, economic resilience, and controlled escalation. The roWorld war guide’s central principle is sequencing: create a local advantage, use it to influence enemy allocation, and commit further resources only when the battlefield supports the next step.
Campaign planning should account for simultaneous threats. A player can have excellent troops but still lose if an ally’s border collapses elsewhere, or hold a coast while cities behind it fall. Use a one-page operational plan with a single primary objective and a clearly defined secondary objective.
Pre-Battle Checklist
A pre-battle review catches weak assumptions before roWorld troops are committed, especially when a plan depends on timing roWorld warship movement, missile coverage, and nuke or MIRV deterrence. For example, if your attack assumes the enemy’s missile defense will remain active for a full sortie, verify that assumption against their visible nuke, MIRV, and warship assets before advancing; otherwise, a short opening may become a costly exchange. Check the following:
-
Your production can replace losses without abandoning key construction.
-
Your target is connected to an outcome that matters for territorial control.
-
The approach avoids predictable and heavily reinforced routes.
-
Your reserve can respond if the enemy reinforces quickly.
-
Your defense remains functional if the attacking force is lost.
-
Your alliance has a clear purpose and timing.
-
Your fleet and land forces can support one another when used together.
The primary objective should be simple enough to guide every decision. “Secure the southern city” is more useful than “destroy everything near the enemy capital,” because it tells you where to push, when to stop, and which enemy units genuinely threaten the plan.
Choosing the Correct Escalation Path
Different tools solve different problems. A troop attack fits routine territorial pressure; a roWorld warship fits coastal and maritime pressure; a roWorld nuke or roWorld mirv fits a narrow escalation window; and a roWorld missile or SAM layer protects high-value territory. Using the strongest available option on a minor target can waste momentum and provoke a response.
| Campaign problem | Primary instrument | Supporting action | Best outcome |
|---|---|---|---|
| Weak border defense | Concentrated troop attack | Economic reinforcement | Gain nearby land |
| Enemy fleet pressure | Naval interception | Land distraction near port | Restore sea access |
| Entrenched blocker | Combined fronts | Use allied pressure | Open an alternate route |
| Critical capital vulnerability | Escalation when justified | Prepared capture force | Convert shock into territorial gain |
| Sudden multi-axis attack | Layered missile and troop defense | Central reserve | Restore initiative |
The final choice should consider map control, enemy reactions, and your own stability. A weapon that wins a local exchange but exposes your capital is not a winning choice. Conversely, refusing every escalation can leave a narrow opportunity unused when patience has already cost you the better position.
Learning From Community Games
A RoFront strategy community video illustrates an observed decision pattern: early expansion is balanced against maintaining a troop reserve near the border. Community videos are useful for identifying recurring behavior, but they are not official balance documentation. Confirm any unit cost, damage value, or build requirement in the current game before treating it as fact.
The Torrey Pines community page on Roblox is the verified creator group associated with RoWorld. Because no separate official patch feed or code system was confirmed, balance information should be checked directly in the client rather than inferred from outside announcements.
Putting the roWorld War Guide Into Practice
A successful player does not rely on one perfect unit composition. They maintain a functioning economy, keep a reserve near the active front, use terrain to reduce risk, and select escalation only when it changes the campaign. This approach makes the roWorld war guide applicable to new conflicts and late-game emergencies.
Preparation determines how much authority you have. Build enough to protect the route, identify the objective, and create a fallback before committing. If the plan depends on a single troop push or a surprise strike, one successful enemy read can ruin it.
The final takeaway is straightforward: control the decision cycle. Gather information, preserve production, choose the terrain, commit at the right moment, and use warships, missiles, nukes, and MIRVs only when their strategic purpose is clear. Consistent execution across those stages is more reliable than reacting to every enemy move.
Frequently Asked Questions
What is the best approach in this roWorld war guide?
The best approach is to build around a steady decision cycle: protect your economy, identify the enemy’s strongest border, concentrate pressure where your troops have a local advantage, and maintain a reserve for counterattacks. Avoid attacking with every roWorld troops stack at once. Expansion, secure production, and only then commit to a sustained campaign.
Should roWorld warships replace land troops?
No. A roWorld warship is most valuable when it controls coastlines, protects ports, supports an amphibious route, or forces enemy attention away from a land front. Land troops still capture territory and secure inland objectives. The strongest campaigns use naval pressure to shape enemy troop movement instead of expecting ships to win the war alone.
When is a roWorld nuke or roWorld mirv worth using?
Consider a roWorld nuke or roWorld mirv when a limited conventional attack cannot open the target, the strategic window is closing, and you have a follow-up plan for taking territory. First confirm that the target matters, that a normal attack will be stopped, and that the expected retaliation fits your broader strategy. Dramatic damage without territorial follow-up offers little lasting value.
How should a roWorld missile defense be positioned?
Place missile defenses in layers around the city, factory, or military infrastructure that matters most. Outer positions should provide warning and time, while inner coverage protects the core. A roWorld missile or SAM network works best alongside garrisons, reserves, and alternative routes, because no single system should be responsible for stopping every possible attack.
Can an alliance change the outcome of a RoWorld war?
Yes, because alliances can divide enemy attention, share defensive pressure, and create simultaneous fronts that a single opponent cannot cover easily. Coordination must be specific about timing and objectives, however. Players should clarify whether allies are pinning defenders, opening a route, capturing territory, or sharing defensive responsibilities before the attack begins.